I’m going to deploy a single instance of a vCenter Server. When I’m going through the vCenter HA configuration process my vCenter will become (Active Node, Passive Node, and Witness Node) will be created during that process. I will not deploy these appliances beforehand.
First, I’m going now to finalize the last step of PSC HA which is run two scripts on PSC appliances as listed.
PSC CONFIGURATION SCRIPTS
Before installing the vCenter Server appliance, we must run two configuration scripts on the PSC appliances.
The first script (UpdateSSOConfig.py) must be executed on each PSC appliance.
The second script (UpdateLsEndpoint.py) it only executed on one of the PSC appliances.
Script 1: SSO Config Script
Navigate to the following directory, then run the following command.
# cd /usr/lib/vmware-sso/bin/
# python updateSSOConfig.py --lb-fqdn=VPPSC.VPASH.COM
Script 2: LsEndpoint Script
# cd /usr/lib/vmware-sso/bin/
# python UpdateLsEndpoint.py --lb-fqdn=VPPSC.VPASH.COM --user=Administrator@vpash.local
Once press enters you should enter SSO domain Administrator password.
INSTALLING THE VCENTER SERVER APPLIANCE
I’m going to initiate the installation of the appliance using the same installer that we used to deploy the PSC appliances.
Since we are repeating most of the steps of the first stage, so I will go directly to deploy vCenter appliance starting with the below step.
Step1
In the deployment type page choose the vCenter Server (Requires External Platform Services Controller) option and click Next.

On the Appliance deployment target page, I will specify the target ESXi host that will run my VM appliance.
Enter the FQDN / IP of the ESXi host, user account, and password and click Next.
There is a Certificate Warning message will appear, click YES to continue.


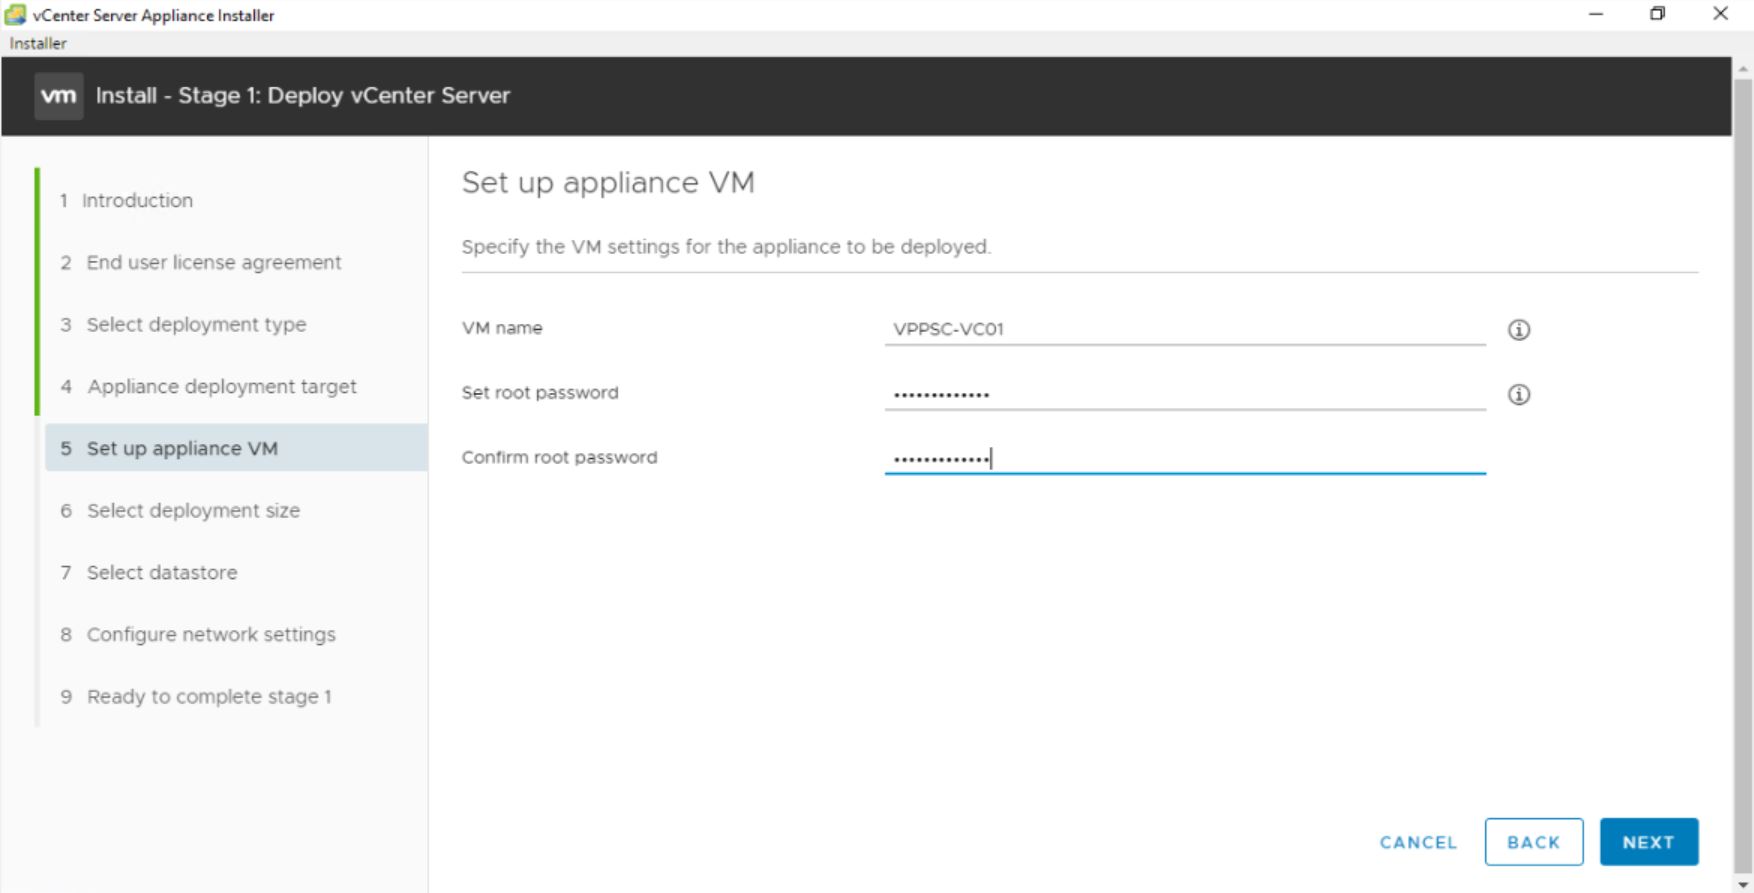
In Set up appliance VM page I have to enter the name of the VM along with the root password.
In the Select deployment size window, I have to select the size of the VM from the drop-down menu Click Next when ready. I’ve chosen Small for my deployment size in my scenario.

In the Select datastore page, I have to choose the datastore to where I want to place the virtual appliance. I’ve decided to Enabled Thin Disk Mode.

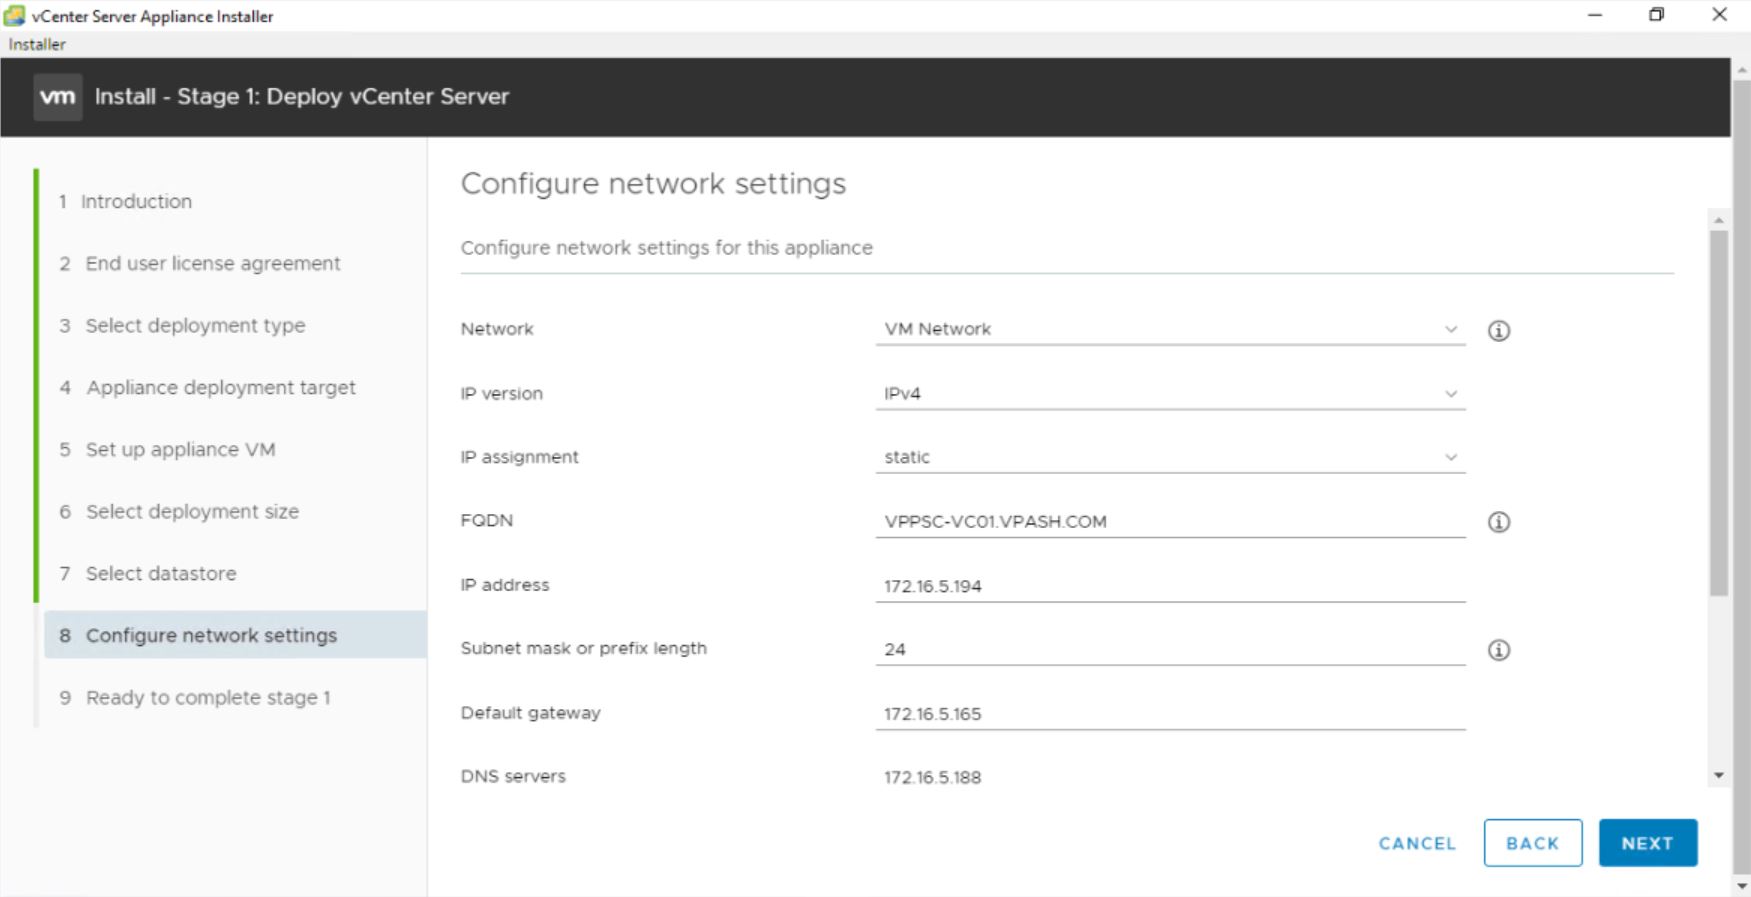
In the Configure network settings page, I’m going to choose the virtual network from the drop-down menu, enter the FQDN, static TCP/IP information and click Next.
Note: make sure the DNS host and PTR records are resolving correctly.
Waiting for few minutes to complete the deployment stage, and after that, we will be ready to go with the second stage which is preparing and configuring vCenter appliance with PSC FQDN which is ready in Parts 4.1, 4.2


Step2
Click Next on the Introduction page.

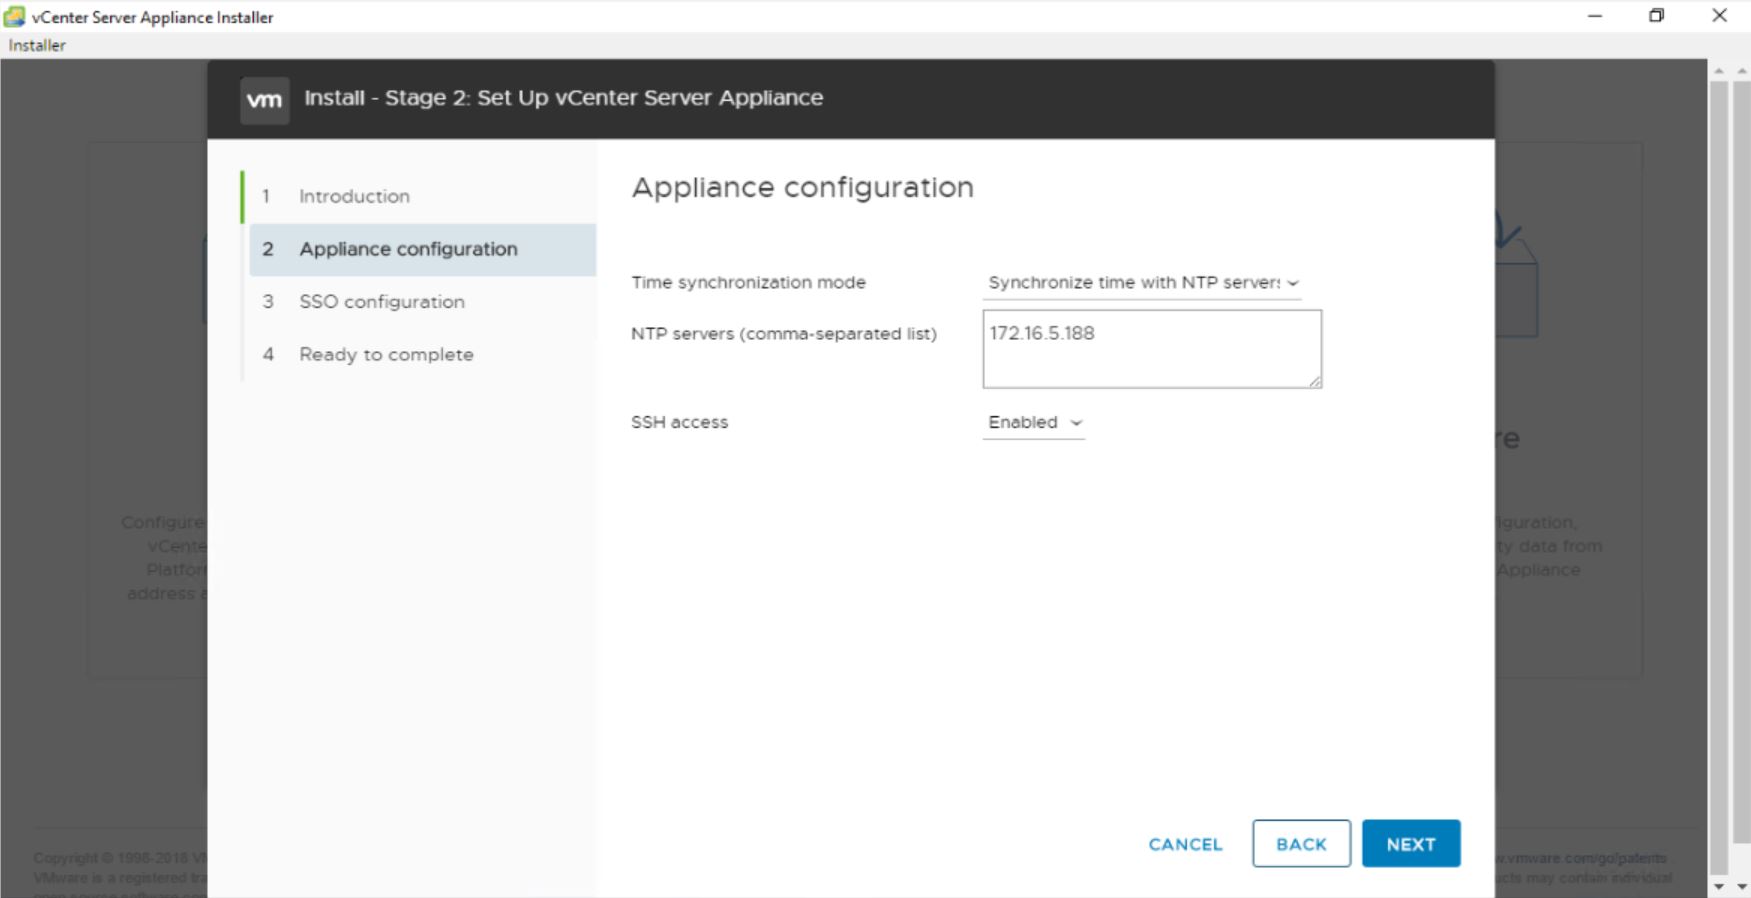
In the Appliance Configuration page, choose the Time synchronization mode and enable SSH access. If you do not allow SSH here, you can always enable it later on the appliance management web interface. Then Click Next.
In the SSO Configuration page, I have to enter the FQDN (hostname) of the PSC that maps to the load balanced IP address which configured in part 4.2 section 8 (Creating the Virtual Server IP).
In my scenario, I am using vppsc.vpash.com which resolves to the VIP address on my load balancer. Click Next when ready.

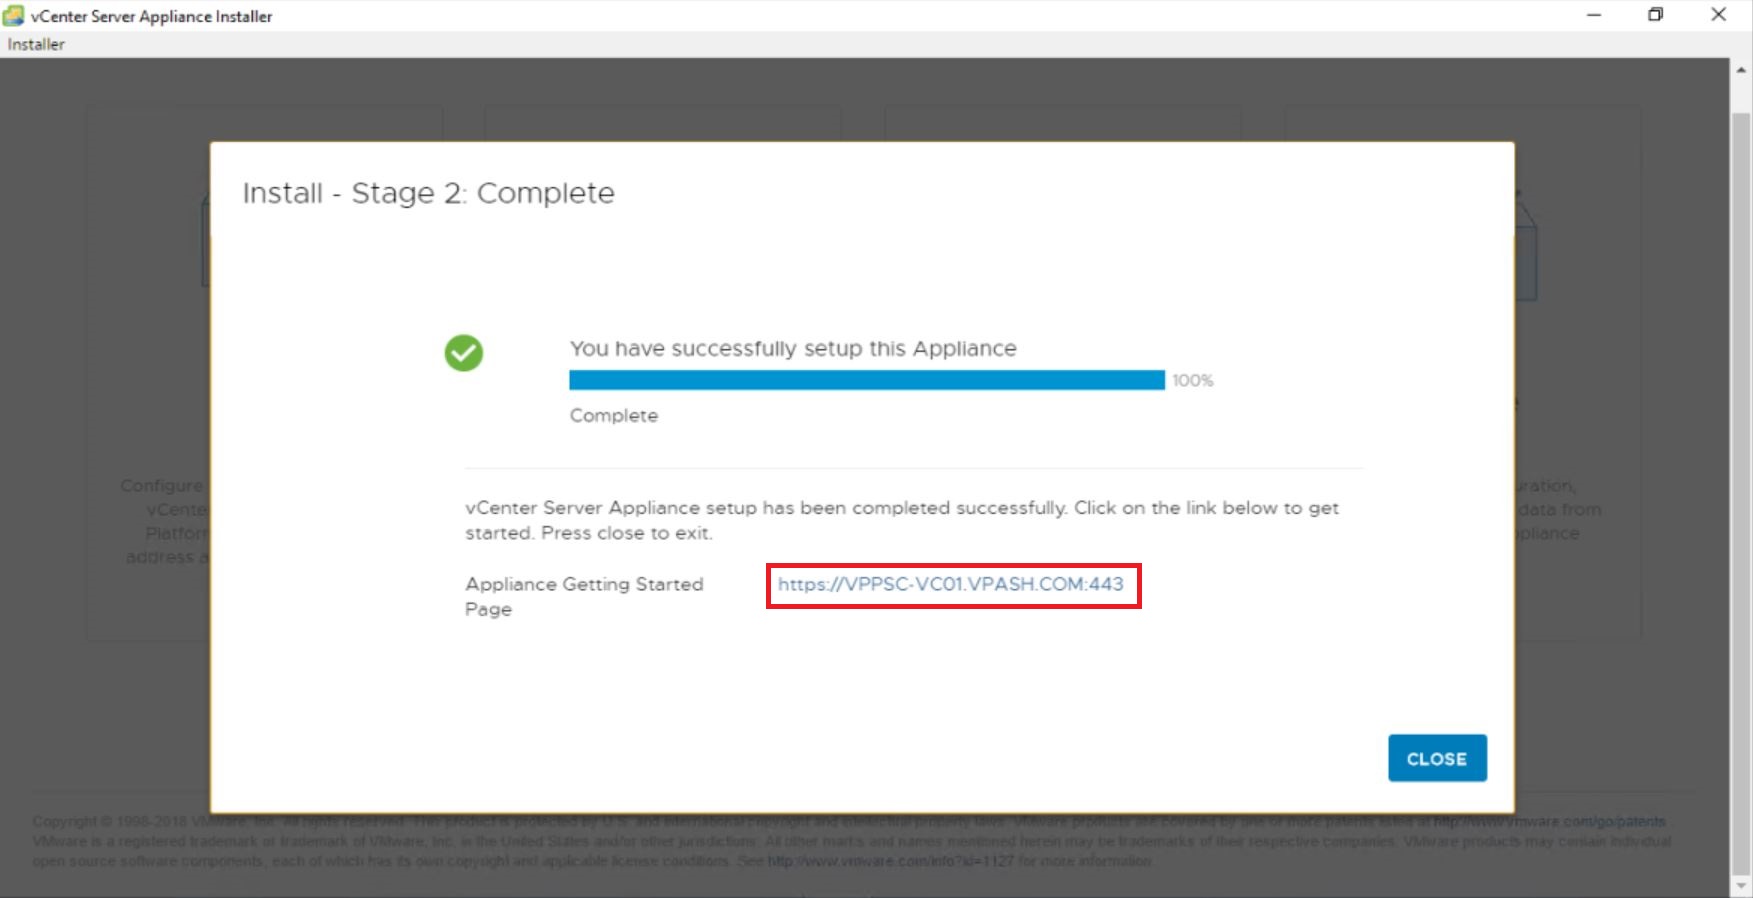
Waiting for few minutes to complete this step, and after that, you can access the vCenter appliance from selected URL.
Thanks for Reading!
QUICK LINKS
- VCENTER 6.7 DEPLOYMENT & TOPOLOGY – OVERVIEW (PART 1)
- VCENTER 6.7 DEPLOYMENT – EMBEDDED PSC (PART 2)
- VCENTER 6.7 DEPLOYMENT – EXTERNAL PSC SINGLE NODES (PART 3.1)
- VCENTER 6.7 DEPLOYMENT – EXTERNAL PSC SINGLE NODES (PART 3.2)
- VCENTER 6.7 DEPLOYMENT – EXTERNAL PSC WITH F5 BIG-IP LOAD BALANCER (PART 4.1)
- VCENTER 6.7 DEPLOYMENT – EXTERNAL PSC WITH F5 BIG-IP LOAD BALANCER (PART 4.2)
- VCENTER 6.7 DEPLOYMENT – EXTERNAL PSC WITH F5 BIG-IP LOAD BALANCER (PART 4.3)