In this Part 4.1 of the multi-part series for vCenter Server 6.7 deployment, I’m going to deploy the two external Platform Services Controller (PSC) appliances.
The PSCs will be load balanced by a 3rd party load balancer. In a real-life deployment, the load balancer could be a virtual or physical appliance, but in my scenario, I will use a virtual appliance.
Note:
If we are deploying a virtual load balancer on the same cluster as the vCenter HA components (PSCs, active node, passive node, and witness node) then should have a vSphere DRS anti-affinity rule.
During this stage of the vCenter deployment, I will focus on the two PSCs that will be serviced by the load balancer.
Part1 – Deployment Of Primary PSC
Step1
Create proper DNS A records for the new PSC & VCSA on your DNS server, then check resolving from that machine you will use it to deploy your appliances.
 Step2
Step2
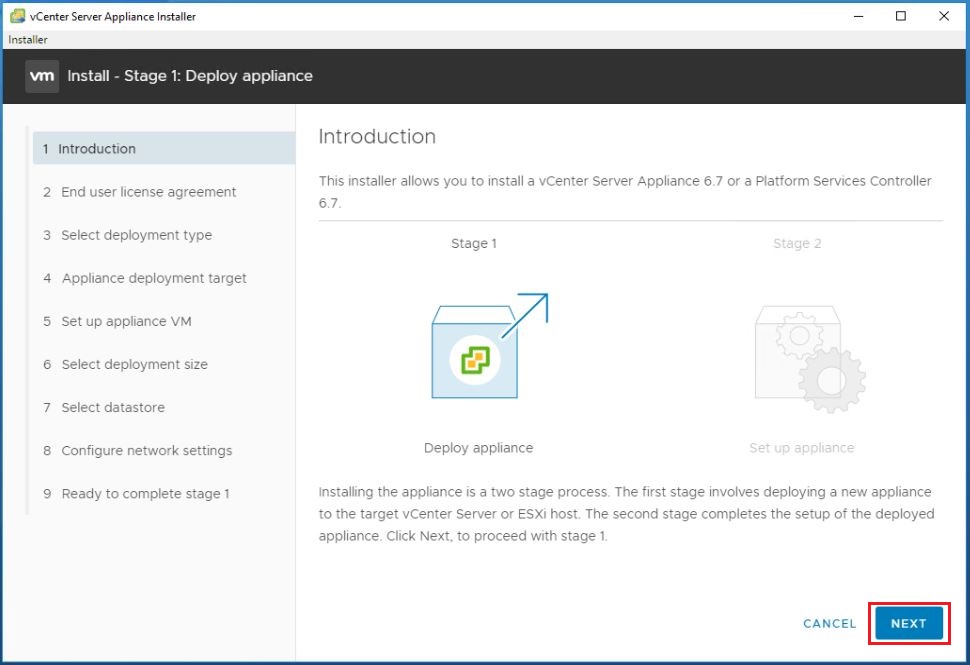
Mount the installation media and launched the installer (X:\vcsa-ui-installer\win32\installer.exe), click Install to proceed, and click Next.

Step3
Select Platform Services Controller under External Platform Services Controller, and click Next.

Step4
Enter the name of the target ESXi host and its credentials where you wish to deploy your External PSC. Click Next. (A certificate warning will appear, click Yes.)


Step5
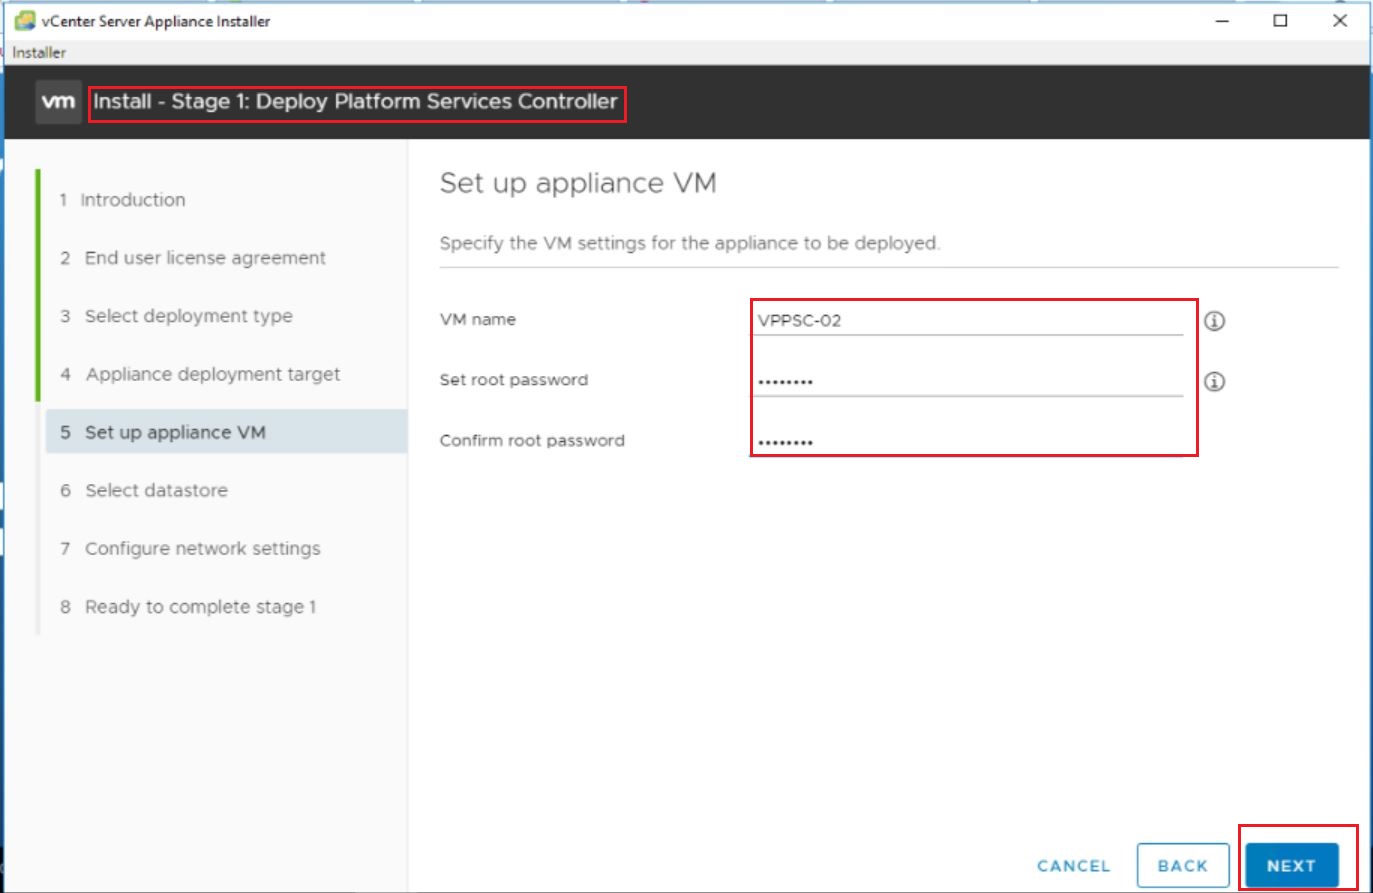
Insert PSC1 VM name as you want it to appear in the VM inventory. Apply a complex root password and click Next.

Step6
Select Datastore. I am operating in a small lab environment, so I have chosen the option to enable ‘Thin Disk Mode’ for PSC.
You will not use this option in a production environment.
Step7
Insert network settings, specify the FQDN, static IP address, mask, gateway and DNS servers and click. Next, now we are ready to complete stage 1, click Finish when ready.

Step8
After few minutes stage 1 will be completed, to make sure, you will see the below window.

Step8
Now I will start stage 2 of PSC deployment, and Set Up Platform Services Controller Appliance wizard will appear. Click Next.

Step9
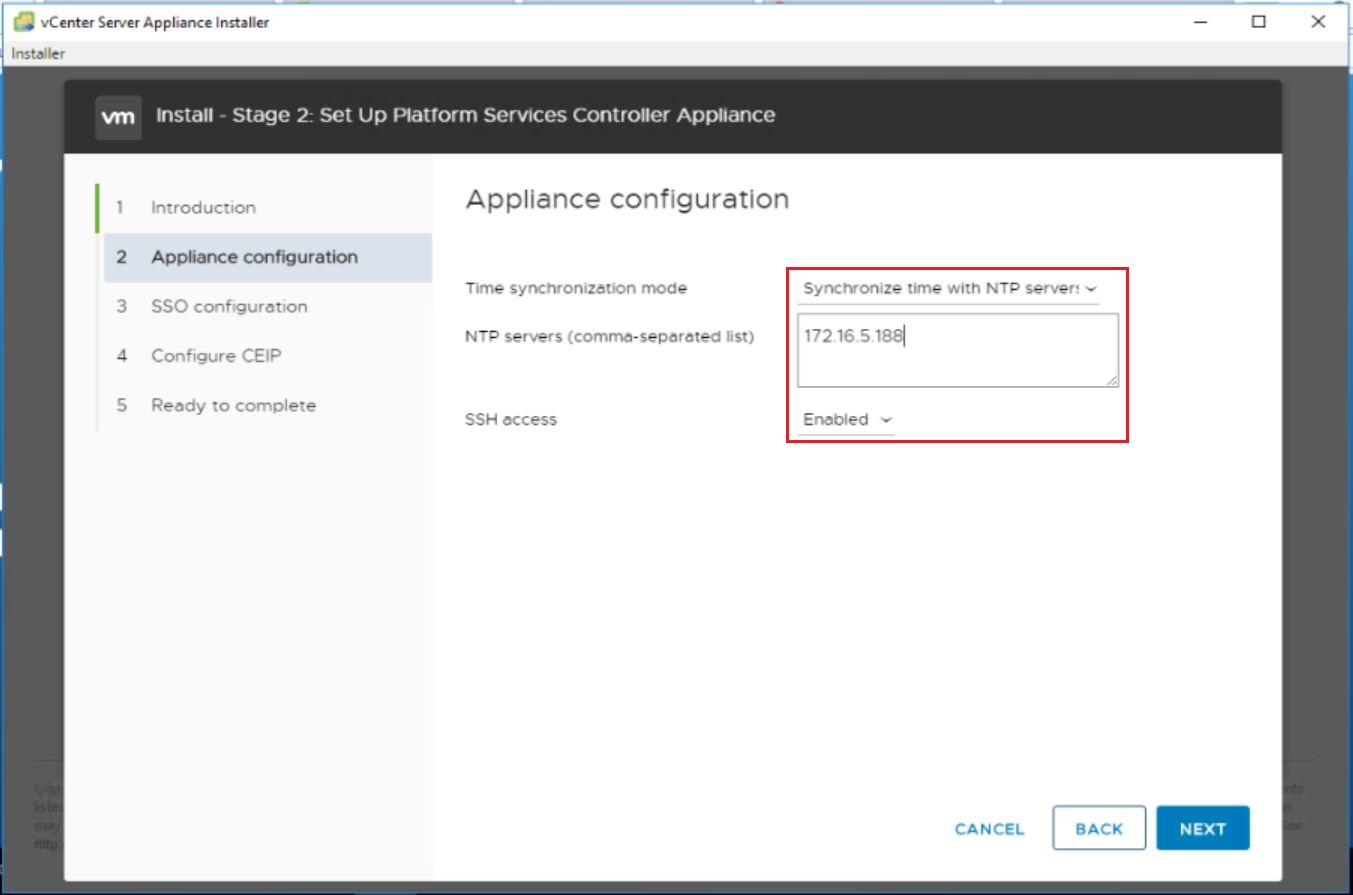
In my lab, I’m going to enable SSH and define NTP server as shown.
Step10
In this step, SSO Configuration page select Create a new SSO domain and then specify SSO domain name, SSO admin password and the SSO site name. Click Next.

Step11
verify all inserted data to make sure SSO domain name, IPs, and hostname, then click Next.
Step12
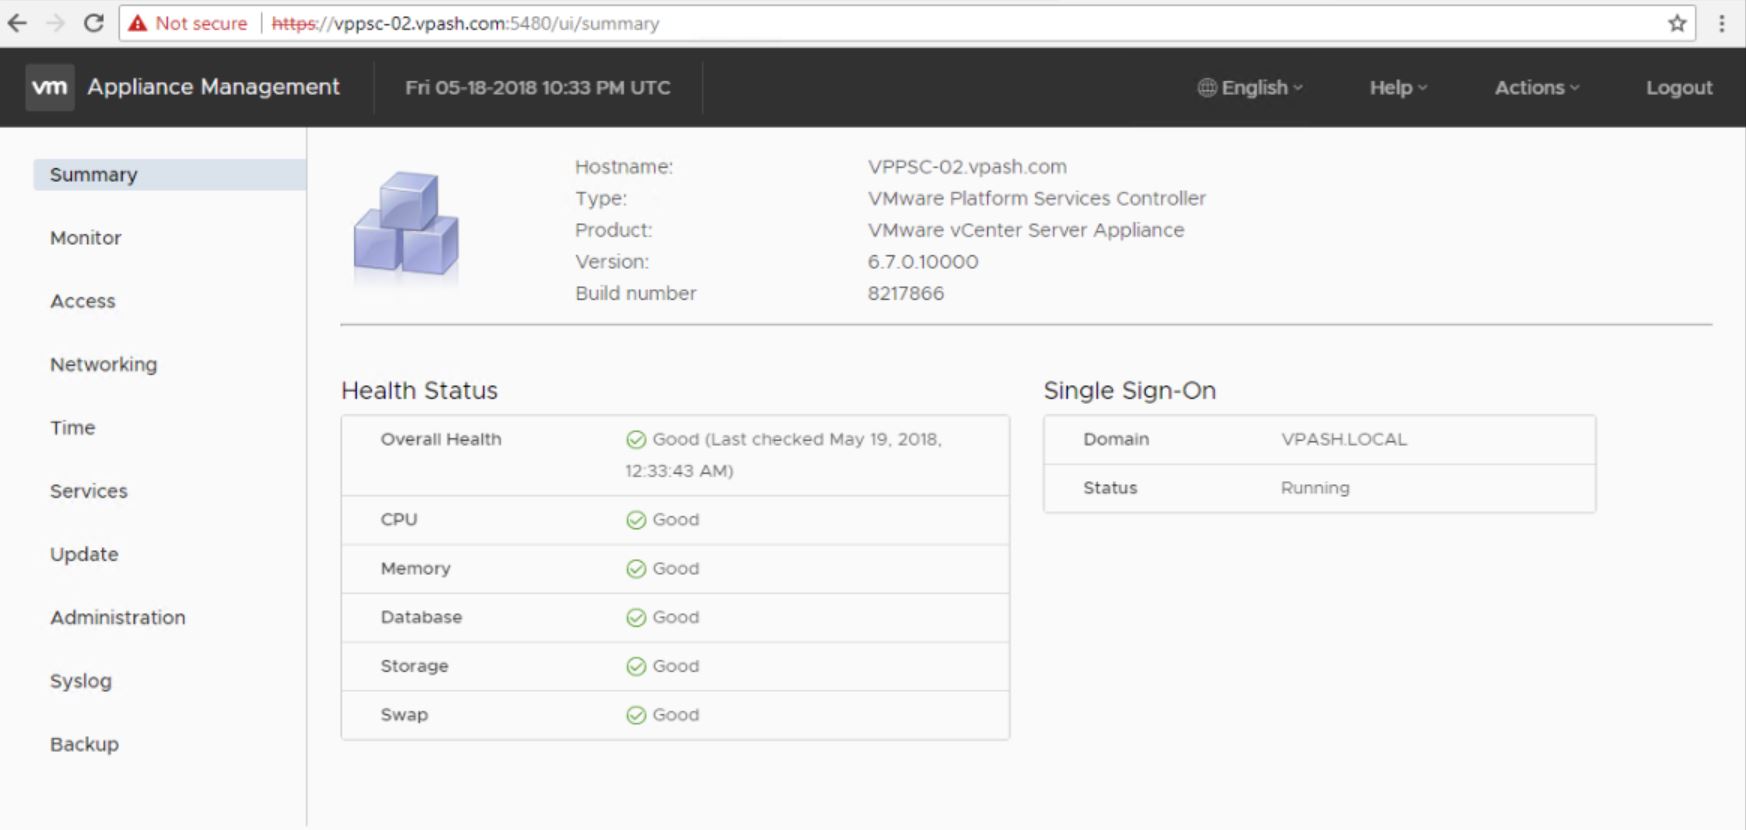
After a few minutes, this step will be completed, and I can reach the first PSC node from this URL.

Step13
The configuration of the PSC1 appliance now completed, and I can access the PSC appliance successfully.

Part2 – Deployment Of Secondary PSC
Briefly, I’m going to repeat a majority of the steps above in part1.
The only differences here are:
1-Deploying the second PSC onto a different ESXi host.
2-Secondly, I’m going to specify the configuration (Install – Stage 2 phase) to JOIN an existing SSO domain and Site, and I’m not going to create a new SSO domain.
Repeat the Steps above with a few exceptions which I will outline below.
Step1
Insert PSC2 VM name as you want it to appear in the VM inventory. Apply a complex root password and click Next.
Step2
Insert network settings, specify the FQDN, static IP address, mask, gateway and DNS servers and click. Next, now we are ready to complete stage 1, click Finish when ready.

Step3
After few minutes stage 1 will be completed, to make sure, you will see the below window.

Step4
On the ‘SSO Configuration’ page select the option to Join an existing SSO domain and then specify the FQDN or IP address of the primary PSC that was deployed. Click Next.

Step5
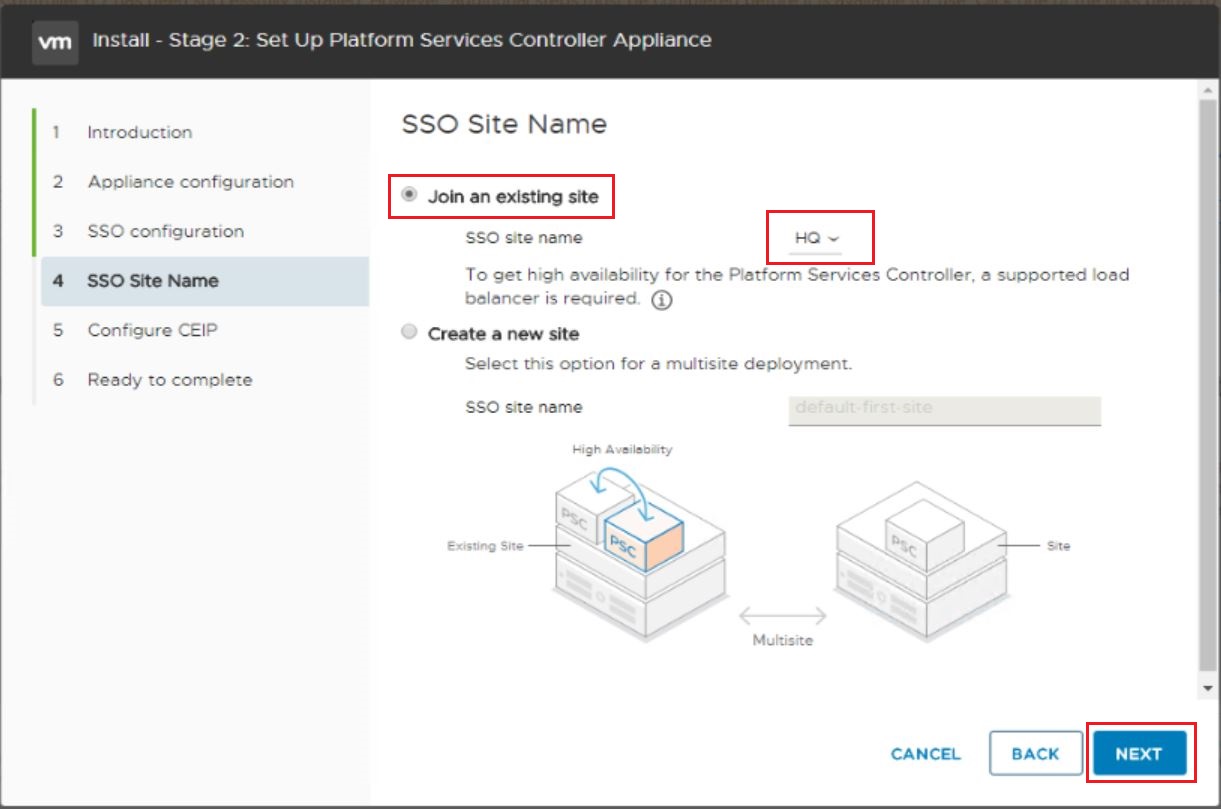
Choose SSO site name to join the second PSC.
Step6
After a few minutes, this step will be completed, and I can reach the first PSC node from this URL.

Step7
The configuration of the PSC2 appliance now completed, and I can access the PSC appliance successfully.
Part3 – Configure Certificate for PSC HA
We came to the fun part of this process which is configuring the certificates for the Platform Services Controllers.
The certifications of the two PSC appliances must be identical before starting the process of deployment vCenter, so I recommend to take a snapshot of PSC,s before beginning this part of the configuration to be able to revert if anything happens during the configuration process.
Step1
I’m going to create the following configuration file, Which I’ve created based on VMware article. VMware KB Article 2147627.
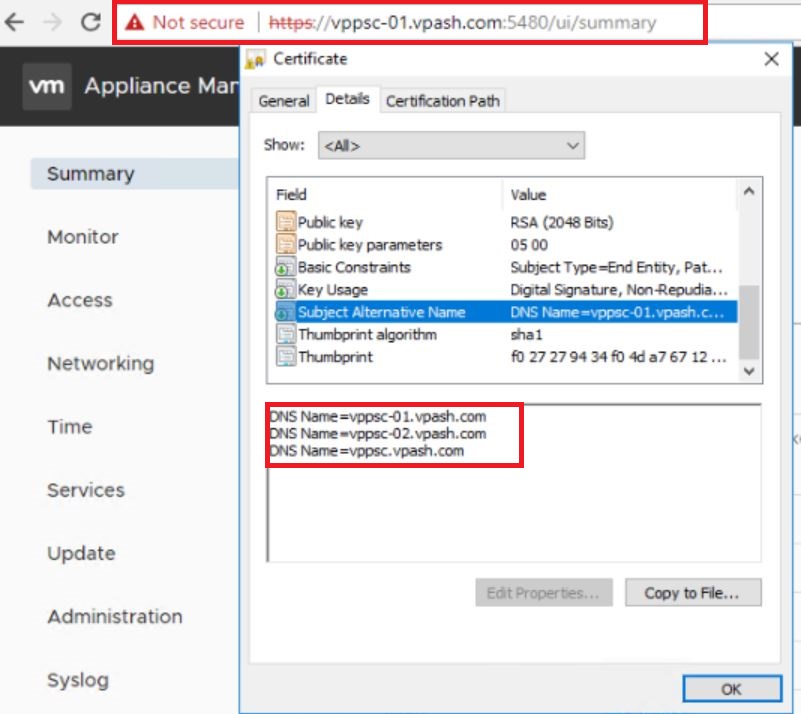
The subjectAltName should include the FQDNs of each PSC and the FQDN that I’m planning to use for the load balanced PSC.
The common name should also reflect the load balancer FQDN.
I saved the file locally on my management machine as psc_ha_csr.cfg.
Step2
1- Connect to the primary PSC via SSH (Putty) and execute the following command.
# chsh -s "/bin/bash" root
Run this command to allow me to connect to PSC using WinSCP, thus allowing me to transfer certificate configuration file above to the /psccerts directory.

Step3
Create a new directory psccerts to copy the config file to it.
# cd /
# mkdir psccerts
# cd psccerts/

Step4
I have copied this file to both of PSC,s to this destination directory /psccerts.

Step5
Now I’m going to execute the following OpenSSL command to create the follow CSR and KEY files.
# openssl req -new -nodes -out /psccerts/psc-ha-vip.csr -newkey rsa:2048 -keyout /psccerts/psc-ha-vip.key -config /psccerts/psc_ha_csr.cfg

Step 6
After that, I’m going to generate the certificates we need using the VMCA on my primary PSC (vppsc-01.vpash.com).
# openssl x509 -req -days 3650 -in /psccerts/psc-ha-vip.csr -out /psccerts/psc-ha-vip.crt -CA /var/lib/vmware/vmca/root.cer -CAkey /var/lib/vmware/vmca/privatekey.pem -extensions v3_req -CAcreateserial -extfile /psccerts/psc_ha_csr.cfg

Step7
This command used to copy the current VMCA root certificate and rename it to cachain.crt.
# cp /var/lib/vmware/vmca/root.cer /psccerts/cachain.crt

Step8
This command used to create a new Machine SSL certificate that contains the two new certificates we created above.
This command will create another certificate which we will use later. This will copy the thumbprints in each certificate into one certificate.
# cat /psccerts/psc-ha-vip.crt >> /psccerts/psc-ha-vip-chain.crt
# cat /psccerts/cachain.crt >> /psccerts/psc-ha-vip-chain.crt

Step9
In this step, I’m going to copy (cachain.crt, psc-ha-vip-key, psc-ha-vip-chain.cert) to the secondary PSC via WinSCP.

Step10
After copied above files to second PSC, I will test command on both PSC,s appliances to check the common name of a certificate.
# openssl x509 -in /psccerts/psc-ha-vip-chain.crt -noout -text

Step11
I’m going to replace the certificates on the two PSCs, first on the primary PSC and then on the secondary PSC.
This is achieved using the Certificate-Manager utility on each PSC appliance.
Execute the following command to launch the Certificate-Manager.
/usr/lib/vmware-vmca/bin/certificate-manager

Select Option 1, provide SSO domain credentials when prompted and then select Option 2 to import the custom certificates and insert Y to accept import certificate.


Now importing certificate has been done successfully.
Step12
I have copied the three certificates to the secondary PSC. Now I’m ready to repeat Steps 10 and 12 on the second PSC.
Step13
Just check the assigned certificate for each appliance, and will find

Part4– F5 BIG-IP Load Balancer Deployment (will be continued in part 4.2)
Thanks.
QUICK LINKS
- VCENTER 6.7 DEPLOYMENT & TOPOLOGY – OVERVIEW (PART 1)
- VCENTER 6.7 DEPLOYMENT – EMBEDDED PSC (PART 2)
- VCENTER 6.7 DEPLOYMENT – EXTERNAL PSC SINGLE NODES (PART 3.1)
- VCENTER 6.7 DEPLOYMENT – EXTERNAL PSC SINGLE NODES (PART 3.2)
- VCENTER 6.7 DEPLOYMENT – EXTERNAL PSC WITH F5 BIG-IP LOAD BALANCER (PART 4.1)
- VCENTER 6.7 DEPLOYMENT – EXTERNAL PSC WITH F5 BIG-IP LOAD BALANCER (PART 4.2)
- VCENTER 6.7 DEPLOYMENT – EXTERNAL PSC WITH F5 BIG-IP LOAD BALANCER (PART 4.3)