In this part, I’m going to explain how we can deploy vCenter Server Appliance 6.7 with Embedded PSC.
First You have to Download the vCenter Server 6.7 from VMware Portal, you can find the download link below.
First of all, you should create proper DNS A record for the new VCSA server on DNS server as shown below.

Verify that the DNS is resolving from the machine you will go to install the vCenter and from ESXi host side as well.

Now we are ready to deploy VCSA 6.7 let’s go.
Double click on Installer.exe located in X:\vcsa-ui-installer\win32, then click on install to start deploying appliance.

We have to go to the next page and click on next, then select accept EULA and click Next.
Next Step we have to choose the deployment type, there are two option one is vCenter Server with embedded PSC or external PSC, Select vCenter Server with an Embedded Platform Service Controller and Click Next

Enter the Target ESXi host FQDN or IP and username and password of the target ESXi host where new VCSA will be installed.
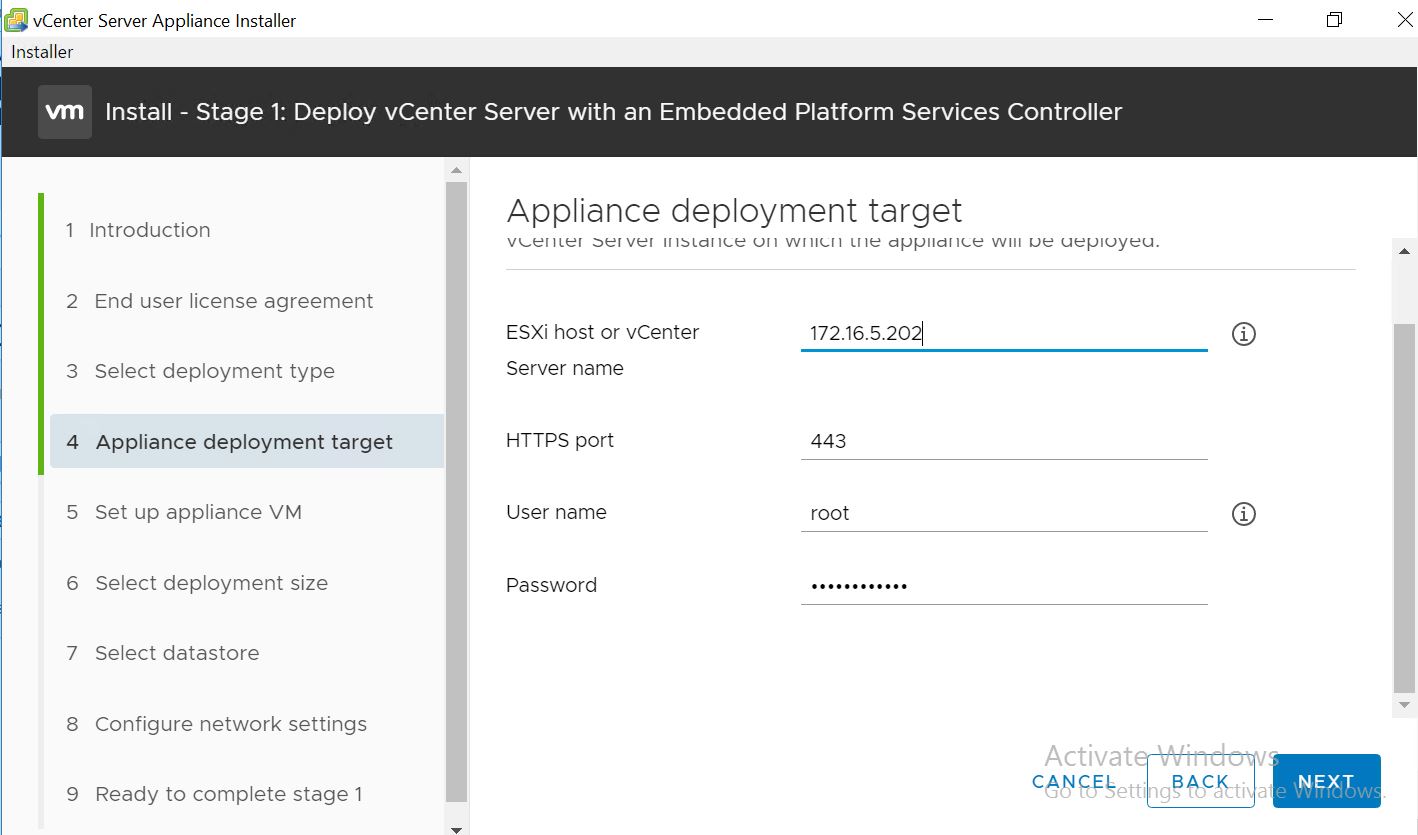
Accept the Certificate Warning to proceed further.

Add the VM Name and root password for the appliance and click Next.
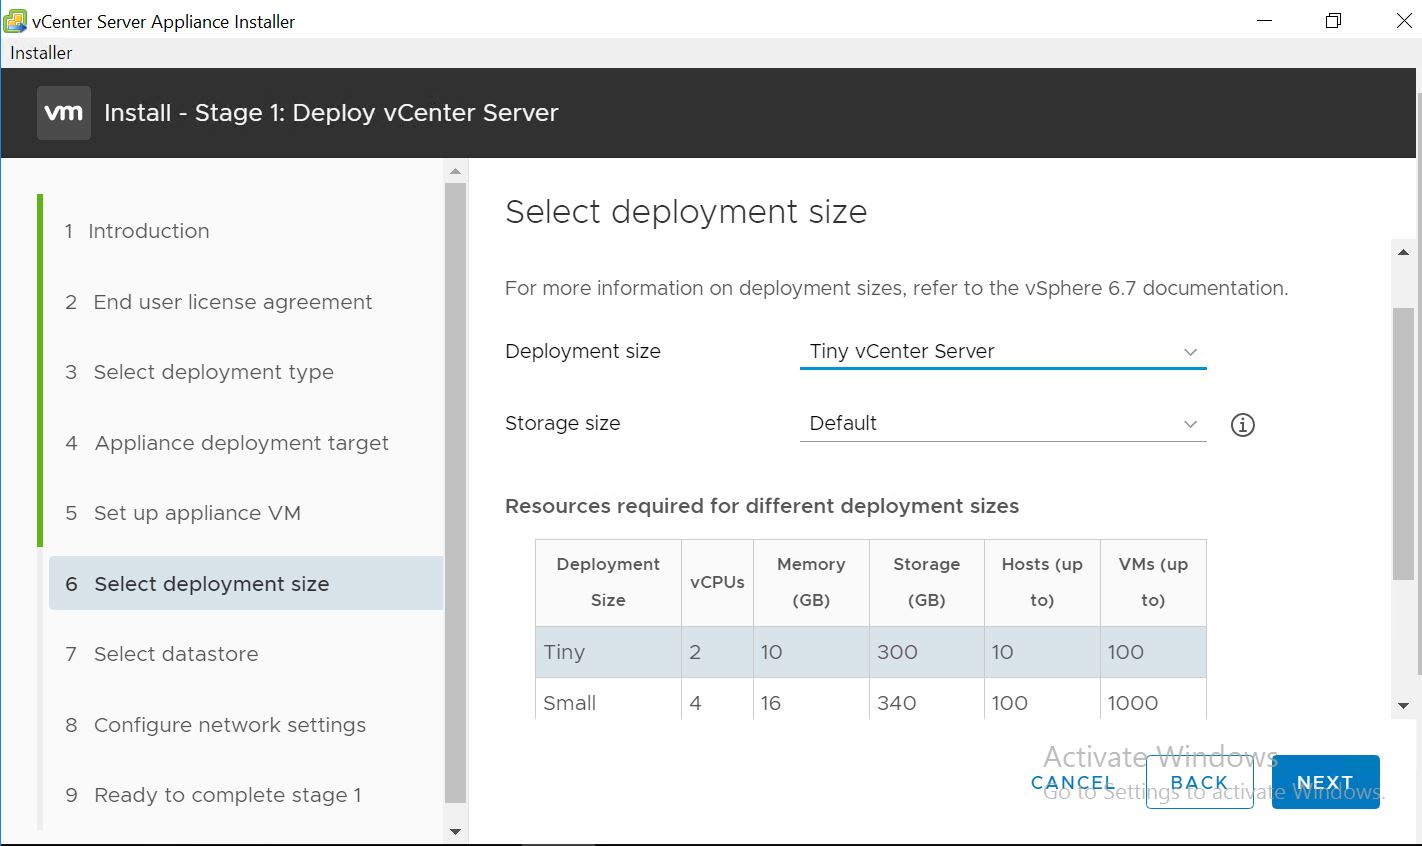
Choose the deployment sizes and click Next, here I selected in my lab tiny vCenter server.
Select the Storage location where this appliance to be deployed and Click Next.

Select the Network to be communicated with VCSA and add the IP details and Click Next
FDQN of vCenter should be resolving else you may get an error on installation time.

Review the settings and Click Finish to Start the Installation of VCSA 6.7.
In progress pop-up will come ad you can review the progress the installation, just wait for few minutes.

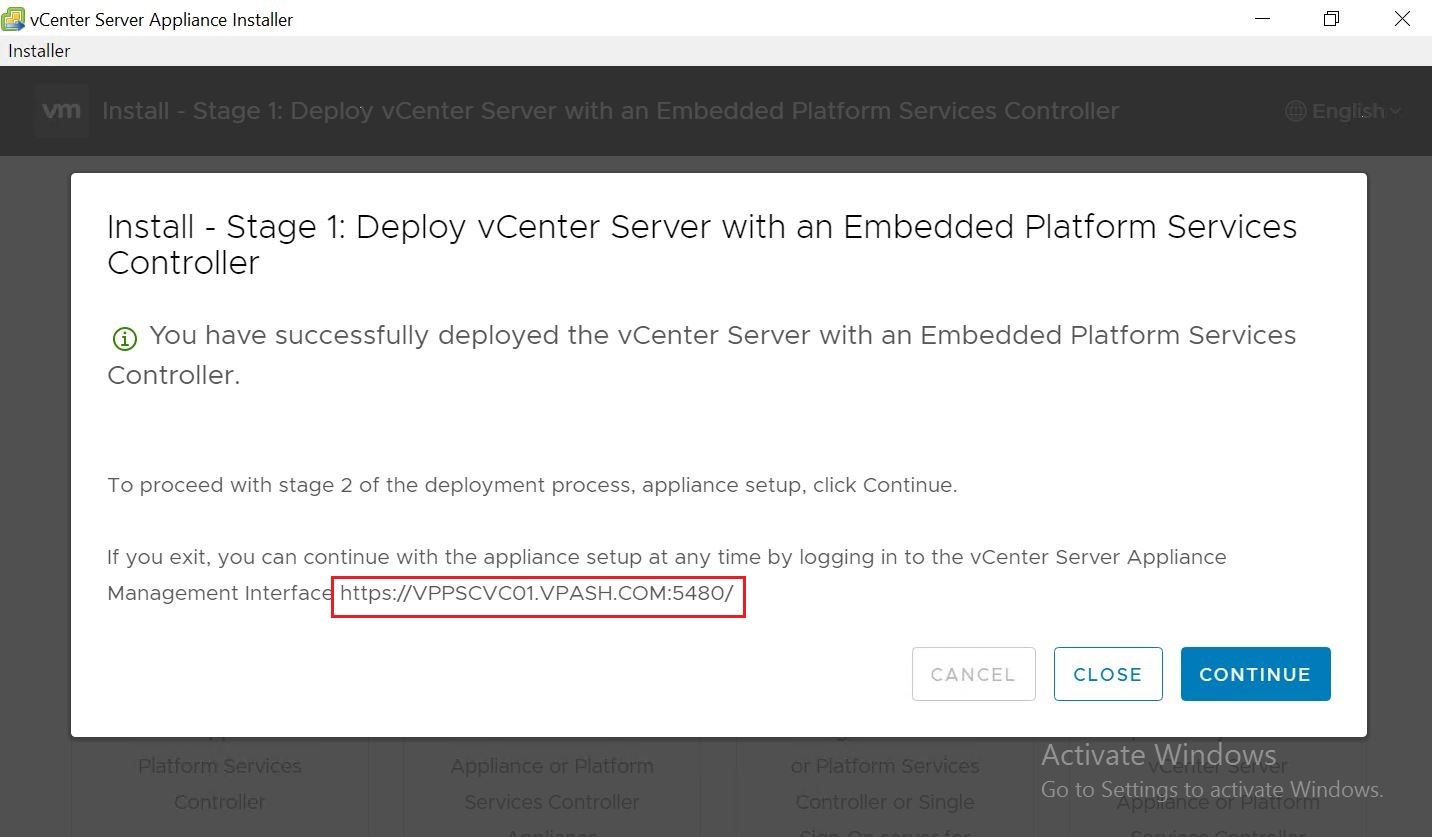
After Completion of the vCenter Appliance installation, you can continue to Next stage of deployment which is appliance setup.
Click Continue to start the Stage 2
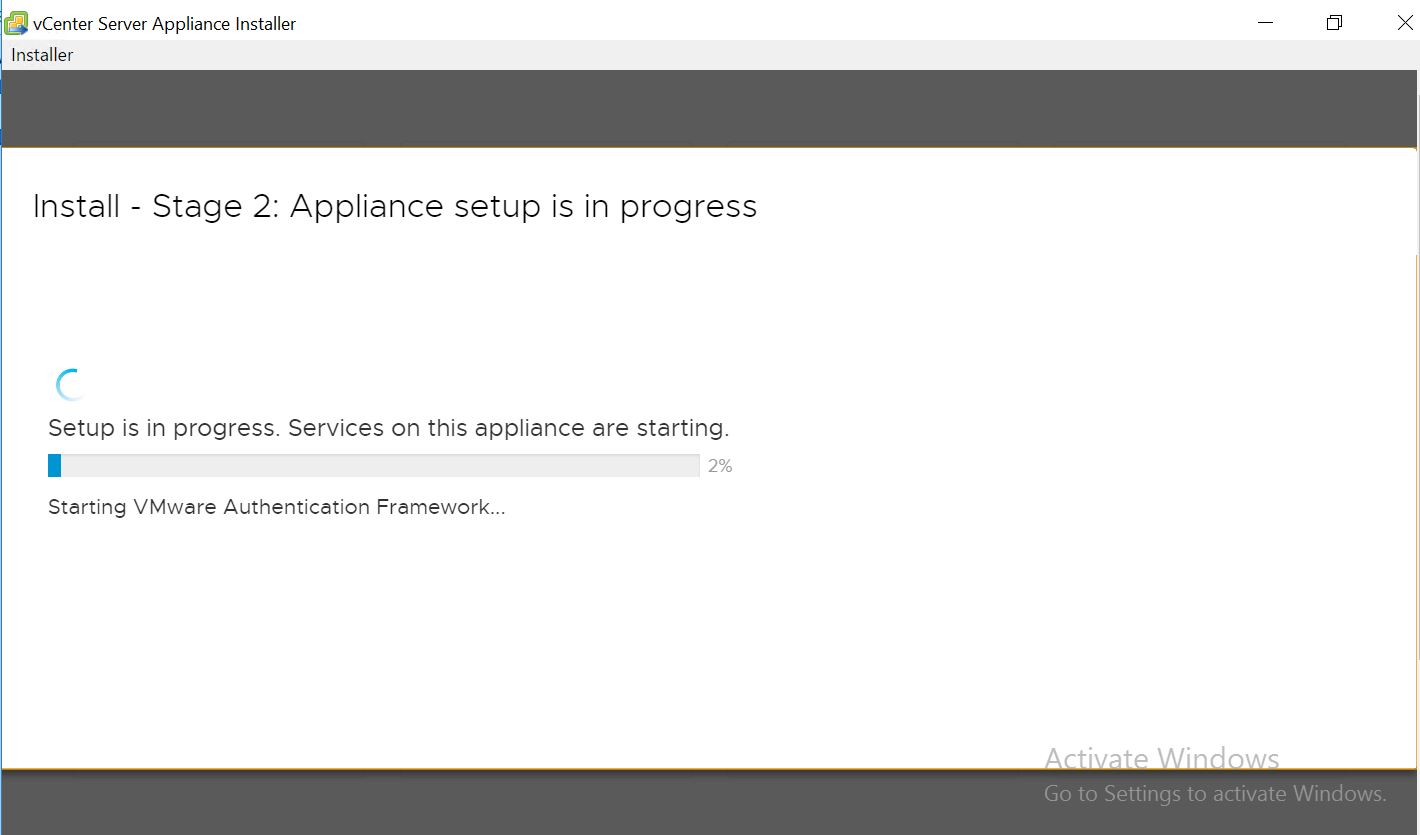
After that, the below window will come which the first step of stage two of deployment, just click Next.

Choose the Time Sync Option, Sync with ESXi or NTP server details, also you can enable or disable SSH access form same window and Click Next.

Prepare and insert the SSO details as shown below.
Note: you can choose any SSO domain name it is not necessary to leave SSO domain name on the default name vsphere.local, then click Next.

If you want to join CEIP the Select Tick on Join VMware’s CEIP option and or you can leave it as it is and Click Next to Continue.

Review the setting of the vCenter Appliance and Click Finish to start the Second Stage Installation.

Wait for few minutes before this step completed.
After Installation completed you can close the window, and you can access the appliance by browsing the address from any browser.

New HTML client login window looks like a below.

Thanks.
QUICK LINKS
- VCENTER 6.7 DEPLOYMENT & TOPOLOGY – OVERVIEW (PART 1)
- VCENTER 6.7 DEPLOYMENT – EMBEDDED PSC (PART 2)
- VCENTER 6.7 DEPLOYMENT – EXTERNAL PSC SINGLE NODES (PART 3.1)
- VCENTER 6.7 DEPLOYMENT – EXTERNAL PSC SINGLE NODES (PART 3.2)
- VCENTER 6.7 DEPLOYMENT – EXTERNAL PSC WITH F5 BIG-IP LOAD BALANCER (PART 4.1)
- VCENTER 6.7 DEPLOYMENT – EXTERNAL PSC WITH F5 BIG-IP LOAD BALANCER (PART 4.2)
- VCENTER 6.7 DEPLOYMENT – EXTERNAL PSC WITH F5 BIG-IP LOAD BALANCER (PART 4.3)